DIY Peppermint Christmas Coaster
The holiday season is upon us, which makes me so happy! I have been wanting to experiment with resin for a while, and I thought it would be so fun to make peppermint coasters that I could use during the holidays season (or beyond if that is your think). I love how these coasters turned out, and I think they would also make a great homemade Christmas gift.
Disclaimer: This project to unique to my other projects because it requires exact detail and it can get pricey. Resin can be expensive, and it is very temperamental. You will see in the full tutorial below, but the most important step is to ensure to measure exactly 1 to 1 ratio when working with your resin and hardener. Also, it is important to stir all of the resin together and for atleast 3 minutes, slowly. If you don’t prepare the resin mixture properly, it won’t cure. However, if you do take you time, measure, and stir slowly you will end up with a beautiful project.
I can’t wait to use these cute coasters for our hot cocoa Chirstmas move nights, and my morning coffee.
Hope you enjoy making these festive and cute coasters.
*This post contains affiliate links. For more information, please see my disclosure page here.
To make your own peppermint Christmas coasters, you will need:
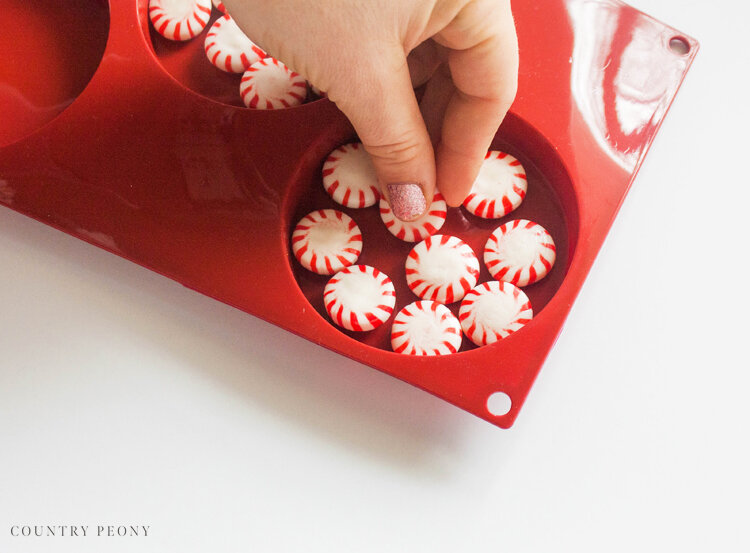
Step 1: Place unwrapped peppermint candies on the bottom of the resin silicone molds. Create whatever design your heart desires. I went for the biggest impact and tried to cover the bottom of the silicone molds with peppermints.
Step 2: Once you add peppermint candies to your silicone mold, prepare your resin. Pour 1 to 1 ratio of resin into hardener into a mixing cup.
*This step is THE MOST important step. Ensure to measure exactly a 1 to 1 ratio, and to stir for atleast 3 minutes. If you don’t prepare the resin mixture properly, it won’t cure. I would suggest using a measuring cup that is not intended for food. You can clean your measuring cup with alcohol, then wipe it with a paper towel and finish with soapy, warm water.
*Don’t follow my lead, because I would recommend wearing gloves to protect your skin from the very sticky resin.
*It is best to do this in a dry, warm area. The colder the area, the more bubbles will form. And, if any water gets into the resin it will become cloudy.
Step 3: Once you fully mix your resin and hardener, slowly pour it over the peppermint candies and into the silicone molds.
I filled up the molds with the resin. As a reference, I used 5 oz of hardener and 5 oz of resin to make a total of 10 oz of product to make all 3 coasters.
Step 4: Remove the bubbles. If you have a small kitchen blow torch you can use it to remove the bubbles. The video from Art Resin’s Amazon product page shows this process. Unfortunately, I don’t have a torch, so I removed the large bubbles by slowly popping them with my spoon.
The small bubbles stayed inside the coaster, but they don’t bother me.
Step 5: Set it aside to cure. It should take about 72 hours to cure entirely.
Step 6: Brew some hot coffee or make some sweet cocoa and enjoy your new coasters this holiday season!


