DIY $10 Christmas Ornament Ball Wreath - Thrift Store Upgrade
*This post contains affiliate links. For more information, please see my disclosure page here.
I love to go thrifting, and when I go thrifting I like to look for items that I can repurpose. Like these beautiful vintage red silk thread ornament balls that I found. I snagged a bag of these for $3 at my local thrift store many months ago with the intention to create a wreath. Then with a dollar store wreath form and some ribbon, I was able to create a beautiful, vintage Christmas wreath for just over $10.
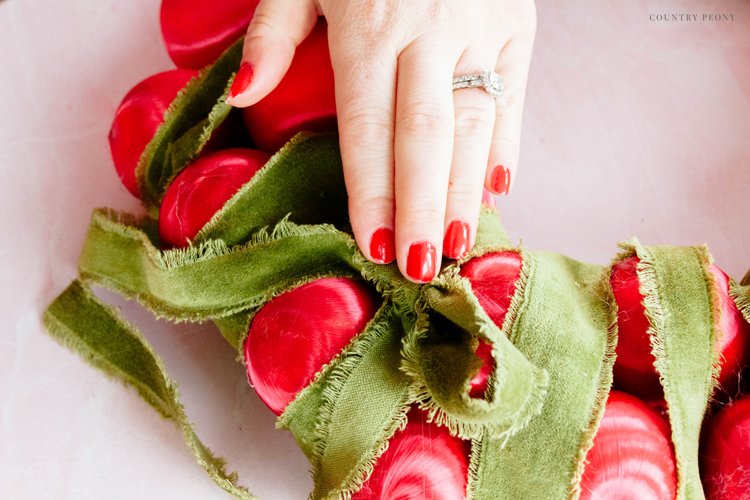
Before I show you how to make the wreath, let’s talk about this stunning velvet ribbon. You can find some incredible torn velvet ribbon on Etsy. Velvet’s rich nature is perfect for holiday decorations, and I believe it accentuates the vintage charm of the red silk thread ornament balls so well. I added the ribbon to hide the small stains that were in the vintage ornament balls, and to hide the hot glue marks. I love how the end result turned out and how the beautiful ribbon is giving the ornament balls a hug!
Even if you can’t find these exact ornament balls in your local store or thrift shop, I hope this DIY inspires you to think outside the crafting box when you are shopping or thrifting. It is amazing how we can transform pieces with a little love and imagination!
Continue below for the step-by-step picture tutorial to make your own ornament ball wreath this Christmas!
Tools
To make your own Christmas ornament ball wreath you will need:
Prepare the Wreath Form
Hot glue the ribbon around the wire wreath form as a base for the ornaments to attach to.
Tightly wrap the ribbon around the wreath overlapping each wrap so that the ribbon covers the entire wreath form.
On every fourth wrap around with the ribbon apply hot glue to the wreath form so the ribbon stays in place.
Continue to wrap the ribbon around the entire wire wreath form.
Then, secure the end with hot glue.
Create the Wreath Hanger
Create the wreath hanger with the same ribbon.
I cut the ribbon in half, and then I attached the ribbon to the back of the wreath form with hot glue to act as a wreath hanger.
Attach the Thrifted Ornament Balls to the Wreath
Remove the hanger from the ornament ball.
One at a time, attach hot glue to the back of the ornament ball and then secure it firmly to the wreath.
Attach another ornament ball right next to the first one with hot glue.
*For added stability, add hot glue to the sides of the ornament ball so you can attach the ornament balls to each other. Hold and press the balls in place while the glue dries.
Continue to add the ornament balls around the entire wreath base until you have filled the entire wreath.
Wrap a Textured, Velvet Ribbon Around the Wreath
To hide the small stains (from age) on the ornament balls and to hide the hot glue, attach a textured ribbon (like torn velvet) around the wreath with hot glue.
Have fun with the placement of the ribbon. Don’t overthink it!
Attach a ribbon to the bottom of the wreath for added whimsy and charm.
Enjoy Your Charming and Vintage Christmas Wreath
I hope you enjoy making your own festive wreath just in time for Christmas.
I believe crafting is more fun when we share our projects. Please email me at elizabeth@countrypeony.com, or please tag me @thecountrypeony or #countrypeony to show me your beautiful, custom creations!
Thank you so much for following along!


