How to Add Wallpaper to a Dresser with Photowall
*Photowall graciously provided the wonderful wallpaper for this post. However, all opinions are honest and 100% my own.
*This post contains affiliate links. For more information, please see my disclosure page here.
Happy May! With summer upon us, I am updating and organizing my children’s shared bedroom so that it can serve them better this Summer when they are home from school. You may remember that last Spring I updated their shared bedroom to create a vintage-inspired space where they could dream, play, and learn.
Click HERE for the full reveal of my children’s shared bedroom.
I still love the design of their bedroom, but I don’t love the lack of storage. So, when Photowall recently reached out about offering me one of their amazing wallpapers to try, I jumped at the idea! I envisioned updating an old dresser with their wallpaper to create pretty and practical storage for my children’s bedroom!
Photowall is this wonderful wall art company based out of Sweden that specializes in prints, posters, wall murals, and wallpapers. They even can create custom art prints and wallpaper for you.
After going through their many incredible options, I finally decided on Garden Poem. I love the whimsical nature of the flowers, and the colors are perfect for the room. After placing the order, it took less than a week to receive the wallpaper. And, I was very impressed with the quality of the paper, and the color saturation on the print.
*Before we move on to the tutorial, I wanted to let you know that Photowall has graciously provided my readers with a discount of 25% with the code: countrypeony25 This code is valid from May 5, 2021 to July 7, 2021. I can’t wait to see what you find!
For your convenience, I have created a step-by-step video so you can see how I updated the dresser with Miss Mustard Seed’s Milk Paint, and then applied Photowall’s wallpaper. Then continue below to follow the step-by-step images to inspire your own wallpaper journey!
Enjoy the video below to learn how to apply Photowall’s wallpaper to update an old dresser.
Follow Below for the Step-By-Step Picture Tutorial
Step 1: Prep the Dresser
Prep the dresser for the paint, and the wallpaper.
I cleaned the dresser thoroughly on the inside and outside with my favorite Thieves cleaner. You can use your favorite household cleaner for this.
Step 2: Paint the Dresser
For this project, I wanted to add a vibrant red to the areas of the dresser that the wallpaper wasn’t going to be on. So, I went with my favorite: Miss Mustard Seed’s Milk Paint. I painted the borders with Tricycle Red to match the dresser that I updated for my children’s bedroom last Spring.
If you want to see the full process for mixing Miss Mustard Seed’s Milk Paint, please visit any of these milk paint projects HERE.
Since the dresser has a lacquer on it, I added Miss Mustard Seed’s Bonding Agent to it so that the paint would adhere nicely to the dresser.
I removed the drawers, then I added two coats of Miss Mustard Seed’s Milk Paint to the dresser.
*The Bonding Agent makes the paint appear more pink when it is wet, but it dries into a stunning red.
Let the paint dry thoroughly before you apply the wallpaper.
Step 3: Add the Wallpaper to the Dresser
Cut out the wallpaper panels along the trim lines.
Photowall provides you with clear instructions for trimming the wallpaper panels.
I recommend giving yourself plenty of room to work, and laying out the panels in the order that they should go. The panels are numbered at the top in the order they should be placed.
Mix the wallpaper paste.
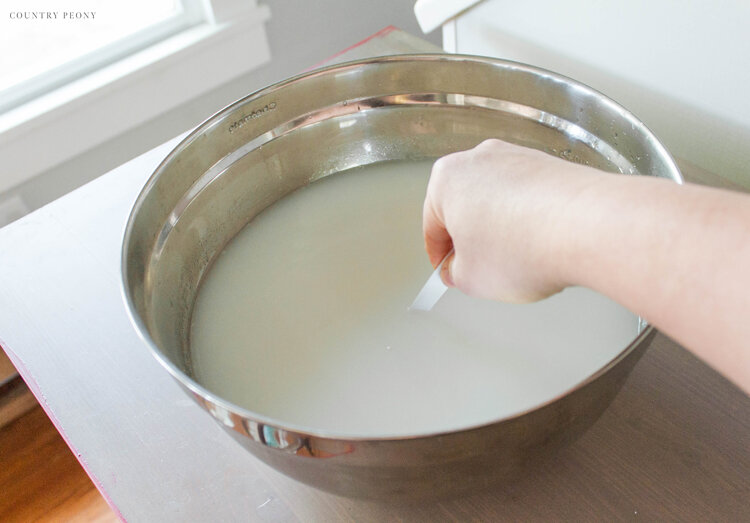
Briskly mix the provided wallpaper paste powder with 1 gallon of lukewarm water until it is fully integrated into the water. Photowall suggests a bucket. I used a large mixing bowl and a disposable fork to mix.
Then let the paste sit for 5 minutes to allow it to thicken.
Use a brush or a roller to add the paste directly to the dresser. Make sure to cover all areas of the dresser that you want the wallpaper to go onto.
I applied enough paste to cover just one panel at a time.
Then attach your wallpaper onto the paste. Hang the panel from left to right.
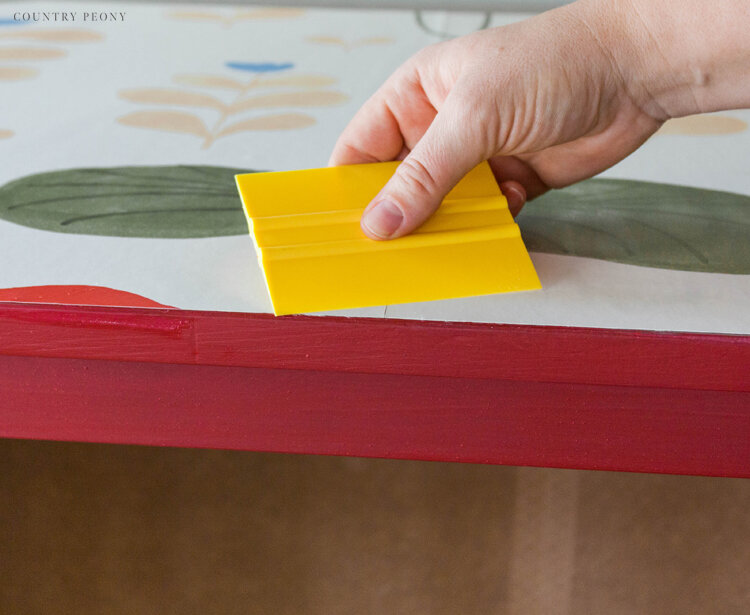
Use your hand, a wallpaper brush, or a hand squeegee like I did to remove any bubbles once you lay the wallpaper down.
Work your way from the center smoothing out to the edges. If you get any wallpaper paste on the edge of the dresser or on the wallpaper, use a damp cloth to remove the wallpaper paste.
Apply your next panel right next to first panel. The panels shouldn’t overlap, but the seams should be touching.
Be careful to match up the pattern of the panels so the design is seamless.
Then repeat the process of smoothing out the wallpaper with your hand, wallpaper brush, or hand squeegee.
Fold the wallpaper over the dresser edge, and use a crafting knife and a metal ruler to trim the excess wallpaper.
Continue to smooth out any bubbles, and remove any excess wallpaper paste with a damp cloth.
Remove the knobs from the dresser drawer faces.
Use the same technique as you apply the wallpaper to the front faces of the drawers, and the sides of the dresser.
Let the wallpaper dry for a full 24 hours.
Step 4: Add the Final Touches
Once the wallpaper is fully dry, find the holes for the knobs and score the wallpaper with a craft knife.
Attach the knobs to the dresser.
Secure the dresser to the wall, then enjoy your custom dresser!
I just LOVE how it turned out, and my children are already filling it with their favorite toys!
Thank you to Photowall for providing the wonderful wallpaper for this post.
Thank you so much for following along today. I hope you enjoy exploring all of Photowall’s amazing products to add a special touch to your home!
*As a reminder, Photowall has graciously provided my readers with a discount of 25% with the code: countrypeony25 This code is valid from May 5, 2021 to July 7, 2021. I can’t wait to see what you find!
I believe crafting is more fun when we share our projects. Please email me at elizabeth@countrypeony.com, or please tag me @thecountrypeony or #countrypeony to show me your beautiful, custom creation!


