DIY Paper Flower Wreath
I love flowers. Wildflowers, homegrown flowers, store-bought flowers, DIY flowers, and the list goes on and on. I love flowers so much that I try to make them a fixture in my home decor.
Paper flowers are having a huge moment. I see paper flowers in decor (nursery rooms, playrooms, office nooks), events (wedding, baby showers, bridal showers), and as part of gift packaging.
Our beautiful, old farmhouse has many indoor doors. I wanted to create a wreath that would complement the romantic, yet simple decor style of our old, new-to-us farmhouse without taking away from the beautiful existing charm. So I took a nod from the trendy paper flowers and created a simple wreath that can stay up year round inside our house.
Anyone Can Craft has a fabulous template for large paper flowers that I used. As a reference, I used the Anastasia Flower template.
Below is a step-by-step tutorial for the large paper flowers. These flowers can then be used on the wall (with the proper adhesive), as part of a tables cape for an event, on a wreath or as part of gift packaging. The possibilities are endless!
*This post contains affiliate links. For more information, please see my disclosures here.
To make your own version of the giant paper flowers you will need:
Step 1: Print out the flower petal template onto a thicker paper. Cut out the template, and start to trace flower petals onto the paper flower cardstock.
Trace and cut out the petals for the size of flower you will need. For my wreath, I made one small flower and one medium flower. For the small flower: I used 5 tiny petals and 5 small petals. For the medium flower: I used 4 tiny petals, 5 small petals and 5 medium petals.
Step 2: Cut the amount of petals that you will need for the entire project. For efficiency, it is best to do each step to its entirety so you can get an assembly line together as you put your flowers together.
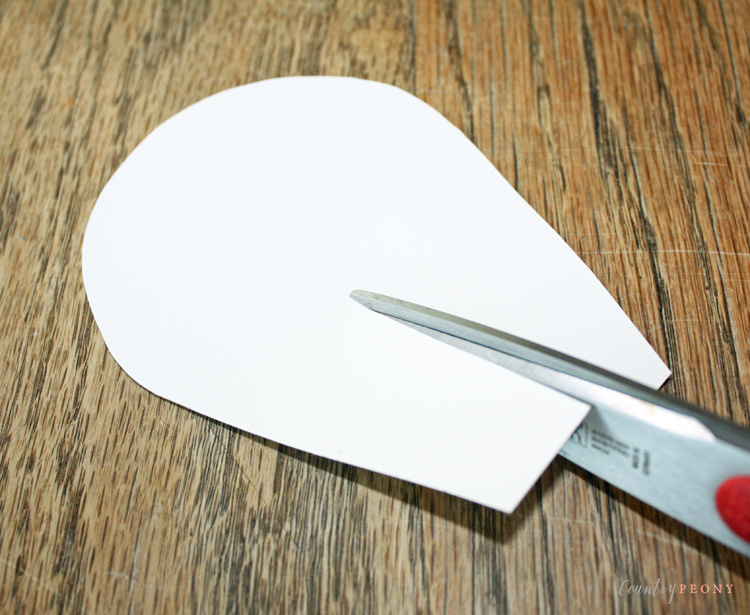
Step 3: Cut each petal halfway from the bottom up.
Step 4: Roll the end of each petal with your round utensil. As you can see above I used a highlighter. For the larger petals, you may need to roll the side of the top as well.
Step 5: Add hot glue to one side of the petal bottom. Please excuse my very dirty, very used hot glue gun.
Step 6: Secure the petal into its shape with the hot glue by criss-crossing the bottom piece of the petal to form an x.
Step 7: Once you have applied all of the steps above to each petal you can start to form your flower. Apply hot glue to the top of the first petal.
Step 8: Attach another petal to the hot glue of the first petal to overlap the two. Continue overlapping each petal until you form the bottom layer of the flower.
Start the second layer by adding the smaller petal to the larger petal (first layer). Repeat by overlapping the same size petals until you create another layer.
Step 9: Once you have created your layers (2 layers for the small flower and 3 layers for the medium flower) cut out a small circle from the glitter ribbon and attach it with hot glue to the center of the flower.
Step 10: Your flower is complete. You can continue to tweak it by rolling the petal edges.
From here you can add the flower to its final spot. I chose to add my flowers to a grapevine wreath with hot glue.
I don't recommend using your paper flower wreath outside. Mine rests happily on my hallway door.
I look forward to seeing your interpretation of the paper flower trend, and where you decide to apply it.


