DIY 4th of July Flower Frill Wreath with Clover
*This post was created through a paid partnership with Clover. However, all opinions are honest and 100% my own.
*This post contains affiliate links. For more information, please see my disclosure page here.
If you have been here for a while you may know that I love creating wreaths. They are the perfect way to welcome someone into your home, and I love placing wreaths on the vintage doors throughout our farmhouse to create a festive and warm space. Holiday wreaths are my favorite, and with Fourth of July right around the corner I thought it would be fun to create a red, white, and blue wreath to honor the holiday.
Today I am excited to partner with Clover to bring you a simple and sweet DIY 4th of July Flower Frill Wreath tutorial using Clover’s fantastic Flower Frill Template. You may know that I love using Clover’s products as you can see from the DIY Colorful Pom-Pom Christmas Tree, the DIY Pom-Pom Heart Wreath for Valentine’s Day, the DIY Pom-Pom & Tassel Bunny Garland for Easter, and more recently the DIY Pom-Pom Summer Floral Arrangement.
This is the first time that I used Clover’s Flower Frill Template, and just like their pom-pom makers and tassel makers it was so easy and fun to use. I am excited to try the different sizes with different fabrics to make cute projects from necklaces to whimsical gift bows. The best part is that you can use fabric scraps to make your flowers.
For your convenience, I have created a step-by-step video so you can see how I made the flower frills using Clover’s Flower Frill Large Template. Then continue below to follow the step-by-step images to make your own DIY 4th of July Flower Frill Wreath this summer.
Enjoy the video below to learn how to make your own flower frill then follow along for the step-by-step tutorial to make your own flower frill wreath just in time for the 4th of July!
Continue below for the step-by-step pictorial to make your own 4th of July flower frill wreath.
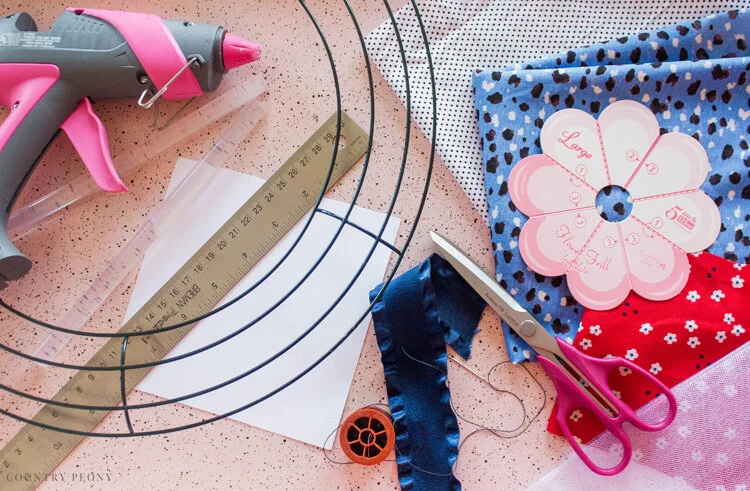
To make your own flower frill wreath you will need:
Step 1: Thread the needle and make a knot. Set it aside for later use.
Step 2: Cut out 15-25 5 3/4 inch fabric squares.
*Keep in mind the more fabric squares you use the fuller your flower will be.
*I created a 5 3/4 inch square template to help guide me as I cut the squares for this wreath.
Step 3: Fold the fabric square in half and place it inside the template at the arrows, number 1 crease.
Step 4: Fold inwards toward the number 2.
Step 5: Fold the number 3’s together on both sides of the template. Away from you.
The 1’s should be facing the outside on each side of the template.
Step 6: Cut along the template at the curved top edge. Cut a little above the template line so you don’t cut the template.
Step 7: Insert the needle and thread through the bottom of the petal. Be sure to thread through all of the folds.
Step 8: Remove the template.
Step 9: Repeat steps 3-8 to create 15-25 petals.
*To add some texture and dimension to the flower I added tulle petals to every fourth petal.
Step 10: Remove the needle, tie the two ends of the thread together with a double knot.
Your flower frill is complete!
Step 11: Make enough flower frills to add to the wreath.
Step 12: Hot glue the ribbon to the back of the wreath to act as a hanger.
Step 13: Hot glue the flower frill directly to the wire wreath.
Step 14: Add another flower frill right next to the original flower frill.
Step 15: Hot glue the petals of one flower to the next flower as well as to the wreath so the flowers stay secure and connected to the wreath.
Step 16: Continue to hot glue flowers and petals to the wire wreath until the wreath is fully covered with flower frills.
Step 17: Enjoy your custom creation!
I love how sweet and festive this 4th of July wreath looks against our baker’s cabinet in our kitchen.
Thank you so much to Clover for the opportunity to make this very fun and festive 4th of July wreath!
I believe crafting is more fun when we share our projects. Please email me at elizabeth@countrypeony.com, or please tag me @thecountrypeony or #countrypeony to show me your beautiful, custom creations!
Thank you so much for following along!


