Bling Ice Cream Pop Magnet with Woodpeckers Crafts
*This post was created through a paid partnership with Woodpeckers Crafts. However, all opinions are honest and 100% my own.
*This post contains affiliate links. For more information, please see my disclosure page here.
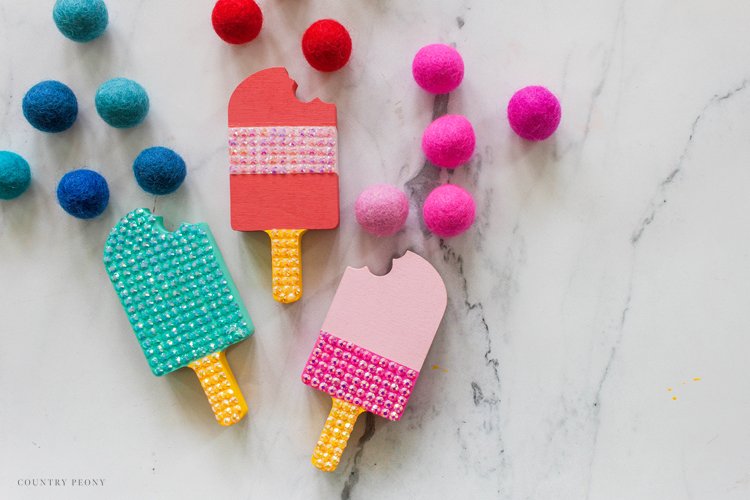
Do you want to add a fun pop of color and sparkle to your Summer? Then I have the perfect craft for you. Today I want to show you how I turned Woodpeckers Crafts adorable Chunky Popsicle Cutout into a colorful and whimsical magnet. These magnets are the perfect way to display your memories and invites on your fridge this Summer.
Woodpeckers Crafts has the best wooden craft products around, and their line of wooden chunky cutouts are so sweet. When I saw their new Chunky Popsicle Cutout I knew they would make the perfect Summertime craft. I love their dimension, and how they create the perfect base for the rhinestones and the magnet.
I love how sweet and whimsical these Chunky Popsicle Cutouts turned out, and I love how you can customize them to whatever color scheme that fits your style! I hope you enjoy making yours just as much as I did!
Before we get started on the tutorial, I wanted to highlight Woodpeckers Crafts. I am so excited to partner with Woodpeckers Crafts today because they provide very high-quality wooden products that are the perfect base for any crafting project. Their mission to use wood to fuel creativity is a wonderful one I can get behind, and I feel so grateful to partner with them on today’s project. And, if you want to try this craft project for yourself or if you want to purchase any of their products, they have graciously offered 5% off your purchase, by using the code “countrypeony”. Want to see more blog post tutorials featuring Woodpeckers Crafts? Click HERE, HERE, HERE, HERE, HERE, HERE, HERE, HERE, and HERE.
Now enjoy a short video tutorial showcasing how to make your own Bling Ice Cream Pop Magnet.
Enjoy this video below showcasing how to create a Bedazzled Ice Cream Popsicle Magnet.
Continue below for the step-by-step picture tutorial to create your own bedazzled magnet!
To make your own Bling Ice Cream Pop Magnet, you will need:
· Woodpeckers Crafts Chunky Popsicle Cutout. Use code “countrypeony” for 5% off your purchase at Woodpeckers Crafts.
· Craft Paint (For this project I used Folk Art’s colors in 1) Baby Pink, 2) Fire Coral, 3) Bright Pink, 4) Adrift, 5) Ballet Pink, and 6) Medium Yellow
· Craft Paintbrush
· Glue Bottle with Precision Tip
· Gem Glue (For this project I used Beacon’s Gem-Tac)
· Small Rhinestones in Different Colors
· Pen Tool for the Rhinestones
· Magnet
· Permanent Craft Glue (For this project I used Beacon’s Fabri-Tac)
Paint the Chunky Popsicle Cutouts
Decide on a color palette. I chose a fun blue and red, with different shades of pink, and yellow for a cheerful Summer vibe! But you can choose whatever color scheme your heart desires.
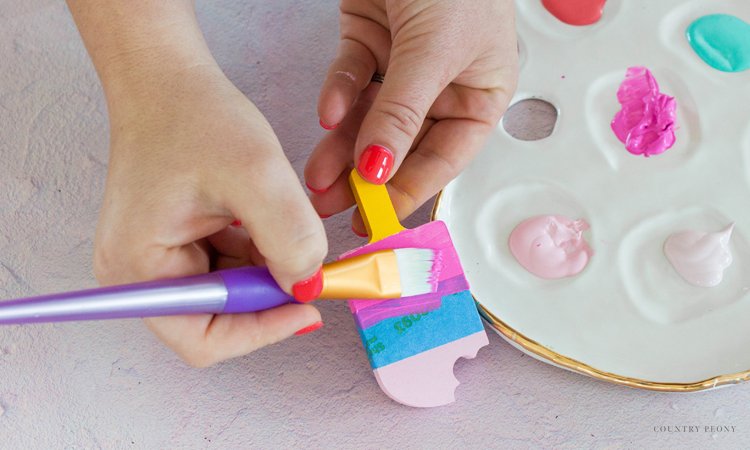
Once you decide on a color palette, apply one coat of craft paint to the front and sides of the popsicle cutout.
Paint the popsicle stick a different color. Then, let the paint dry.
You can also choose to create a fun color block effect with the help of painter’s tape. Just have fun with the design and color palette. *My only recommendation is to keep the design simple so that the rhinestones can shine and be the star of the show!
Attach the Rhinestones to the Painted Popsicle Cutout
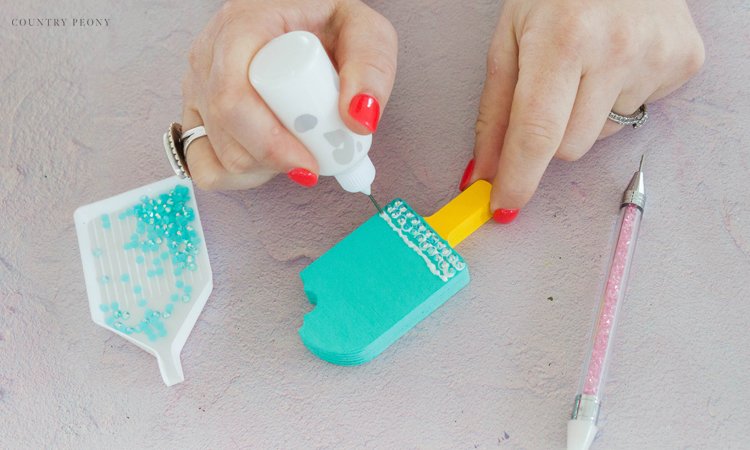
To help with better precision and application, add gem glue to a small bottle with a precision tip.
*I also recommend using a rhinestone tray for easy access to the rhinestones during application.
Apply one thin line of gem glue to the painted cutout.
*Don’t worry if you apply too much glue, because it will dry clear.
Use rhinestones that are in the same color story as the paint. Then one at a time, use the pen tool to attach the same colored rhinestones to the line of glue.
I kept my rhinestone design simple by attaching the rhinestones in a line so that they match up, but you can choose whatever rhinestone design you want.
Continue to attach the rhinestones to the popsicle.
*You can attach rhinestones to the entire popsicle, or to specific parts of the popsicle. It is up to you! My only suggestion here is to try to color match the rhinestones to the paint color.
Attach the Magnet to the Bedazzled Popsicle Cutout
Once the glue is dry and the rhinestones are secure, turn the popsicle cutout over. Then, use permanent craft glue to attach a magnet to the back of the cutout.
Enjoy Your Bling Ice Cream Pop Magnets
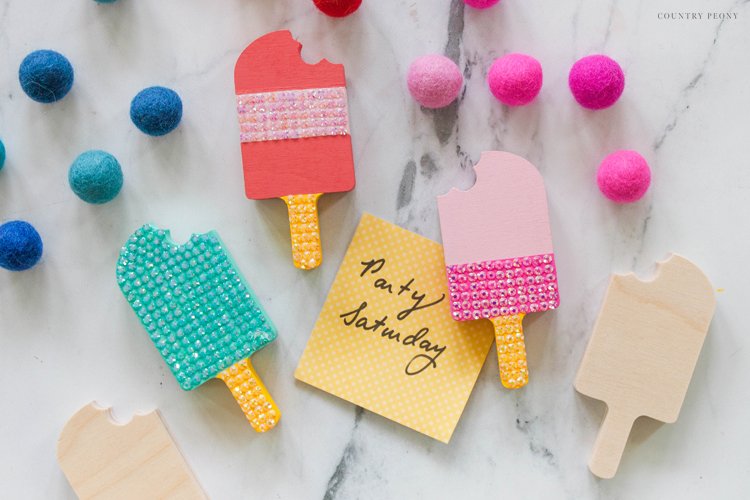
Place your ice cream magnets on your fridge to display important dates or special memories this Summer!
Thank you to Woodpeckers Crafts for providing me with your amazing products to create this Bling Ice Cream Pop Magnet. As a reminder, if you want to create your own, please use code “countrypeony” to receive 5% off at checkout at Woodpeckers Crafts.
As with all of Woodpeckers Crafts products, the creative possibilities are endless! I hope you enjoy crafting with Woodpeckers Crafts this Summer!
I believe crafting is more fun when we share our projects. Please email me at elizabeth@countrypeony.com, or please tag me @thecountrypeony or #countrypeony to show me your beautiful, custom creations!
Thank you so much for following along!


