How to Make a Dried Lavender Wreath for Less Than $25
**Part of the Fall Decor on a $25 Budget Blog Hop**
Happy September! If you are coming here from Eleanor Rose Home, welcome! Aren’t Heidi’s decoupage pumpkins the cutest?
Today’s project was inspired by one of my most popular Fall projects: DIY Whimsical Lavender Wreath. Since that wreath involved faux lavender, many of you requested that I make a wreath out of dried lavender. So today I am so excited to show you how to create your own dried lavender wreath.
I love todays wreath project because it cost less than $25 to make. However, it would be cheaper if you dried the lavender yourself. HERE is a good article on how to dry lavender. I also love this project because it is so aromatic. And the beautiful tones of the subtle dried lavender make it the perfect transitional Fall decor.
Before we start, I want to mention that this project is very messy. Make sure to give your lavender a good shake before you start. *I recommend placing a large sheet underneath as you shake the lavender so you can collect the seeds for later use (handmade sachets are a beautiful way to use the seeds and they make wonderful gifts). The lavender is also very aromatic. So, be sure to work on this in a well ventilated room.
But first, please enjoy this quick video showcasing the process of making a dried lavender wreath.
Continue below for the step-by-step pictorial to make your own whimsical lavender wreath.
*This post contains affiliate links. Thank you for helping to support this blog. For more information, please see my disclosure page here.
To make your own whimsical lavender wreath, you will need:
Attach the Lavender Bundles to the Wreath with Zip Ties
Gather about 15-20 lavender sprigs to create a bundle for the wreath.
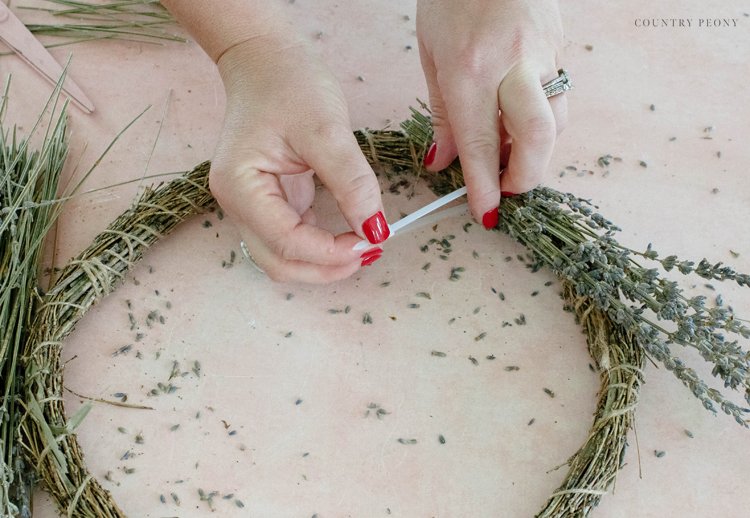
Attach the lavender bunch to the grapevine wreath with a zip tie.
*Grapevine wreaths are the best base for this project because you don’t have to cover them, and they act as a beautiful and natural base for the lavender to shine off of.
Trim the zip tie with scissors.
*For added stability, you can attach more than one zip tie to each lavender bunch.
Repeat until you add enough lavender bunches to cover the wreath.
*For the 10 inch Dollar Tree wreath, I attached 14 bundles with zip ties. However, please add as much or as little lavender as your heart desires. More will give you a fuller look and less will give you a more delicate look.
Overlap the flowers from one lavender bunch on top of the stems of the nearest lavender bunch.
When you get to the last lavender bundle, neatly tuck it under the first lavender bundle.
Trim the Lavender on the Wreath
Then trim the lavender ends with a scissor so that they naturally flow with the wreath.
Now it is time to fine tune. Make adjustments to the placement of the lavender by securing the lavender with hot glue to the wreath and to each other.
Create a Hanger for the Wreath with a Velvet Ribbon
Create a hanger for the wreath with a beautiful textural bow, and hang it for all to enjoy!
Hang the Wreath for All to Enjoy this Fall
I believe crafting is more fun when we share our projects. Please email me at elizabeth@countrypeony.com, or please tag me @thecountrypeony or #countrypeony to show me your beautiful, custom creations!
Thank you so much for following along!
To continue the Fall Decor on a $25 Budget Blog Hop, head over to Stacey at Green Valley Gable. She is sharing more Fall Decor on a Budget! You can continue on visiting ten bloggers total to round up all our budget-friendly home decor ideas for Fall.
More Fall Décor on a Budget Inspiration


Eleanor Rose Home | The Country Peony | Green Valley Gable | Stilettos & Shiplap | Cottage In The Mitten


Le Cultivateur | Midwest Life & Style | Robyn's French Nest | The Tattered Pew | Cottage on Bunkerhill


